Anomaly Detection
Before starting any of these examples, please ensure that you installed Pycaret=>2.2 in your working environment. You can use pip install pycaret==2.3.8 to install it too.
Basic Pycaret AutoML Anomaly Detection
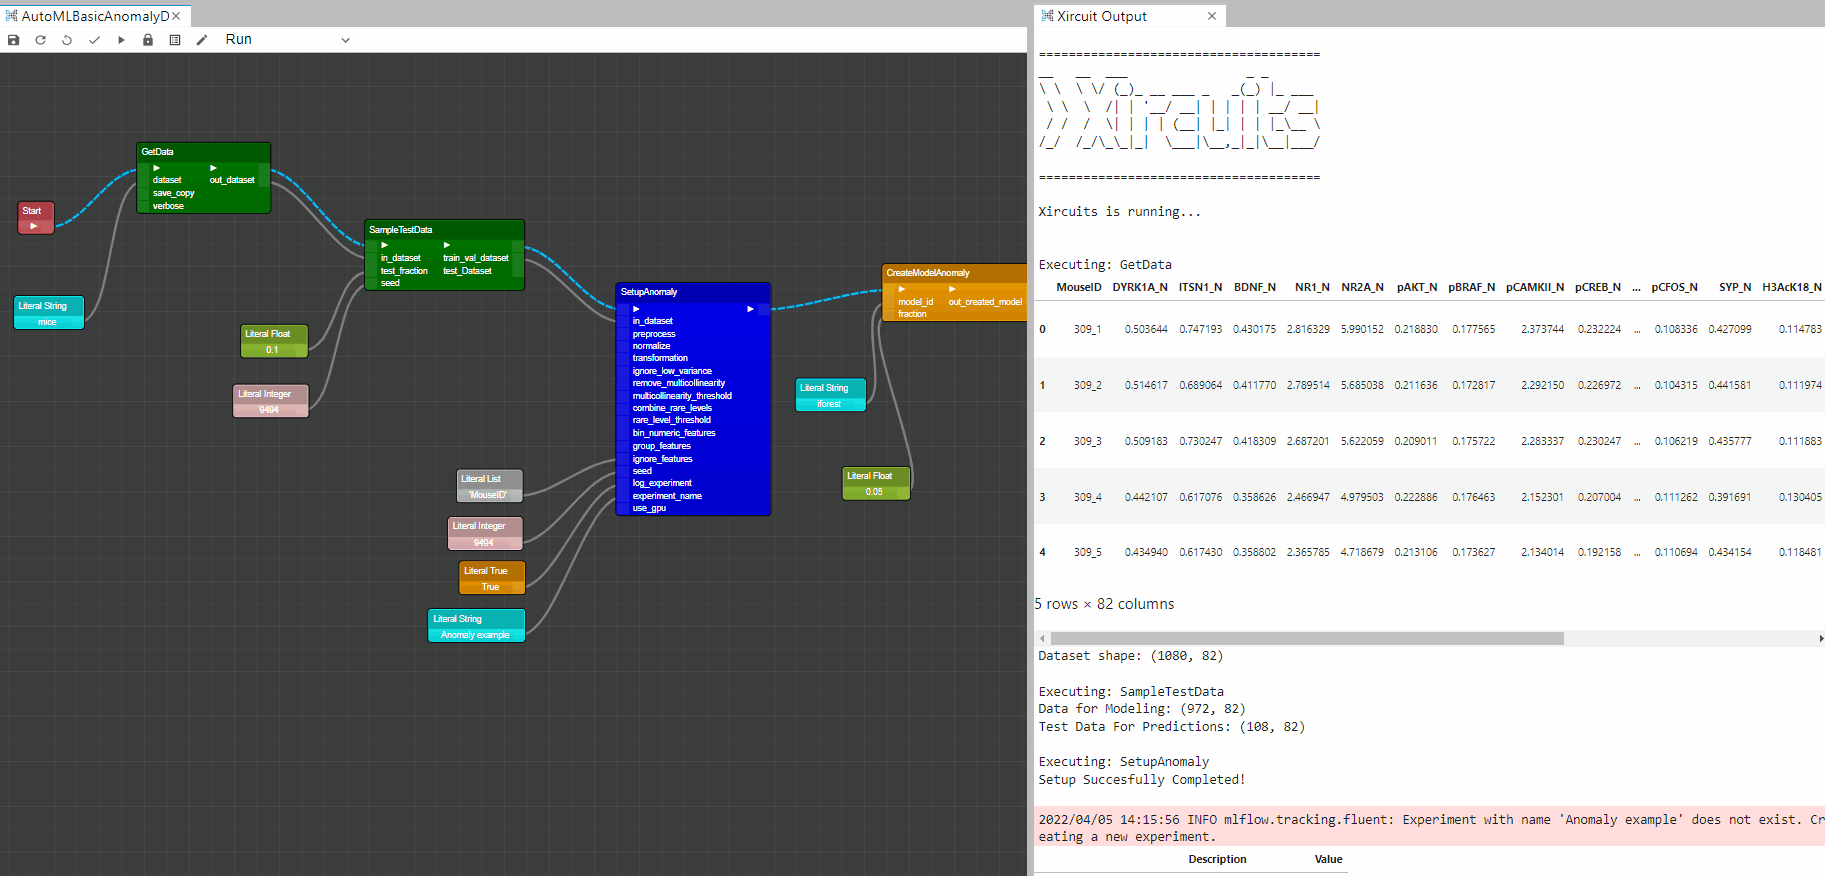
Example: AutoMLBasicAnomalyDetection.xircuit
In this example, you will learn how to build a basic anomaly detection Pycaret application that reads a tabular dataset, setup environment, create and assign anomaly detection ML models, plot results and save the trained model.
-
To start the workflow,first you will need to get a dataset with
GetData. Here we chose the mice dataset. Additionally,SampleTestDatacould be used to set-aside a testing dataset. -
To setup the Pycaret AutoML environment you will need the
SetupAnomaly, This component initializes the training environment and creates the transformation pipeline.SetupAnomalycomponent must be present before executing any other component. It takes one mandatory parameter in_dataset. All the other parameters are optional. -
CreateModelAnomaly: This component trains and evaluates the performance of a selected model. The output of this component is a trained anomaly detection model. -
AssignModelAnomaly: This function assigns anomaly labels to the dataset for a given model, in this case we used the trained model fromCreateModelAnomalyto add two columns Label and Score. In label 0 stands for inliers and 1 for outliers/anomalies. Score is the values computed by the model. Usually, outliers are assigned with larger anomaly scores. -
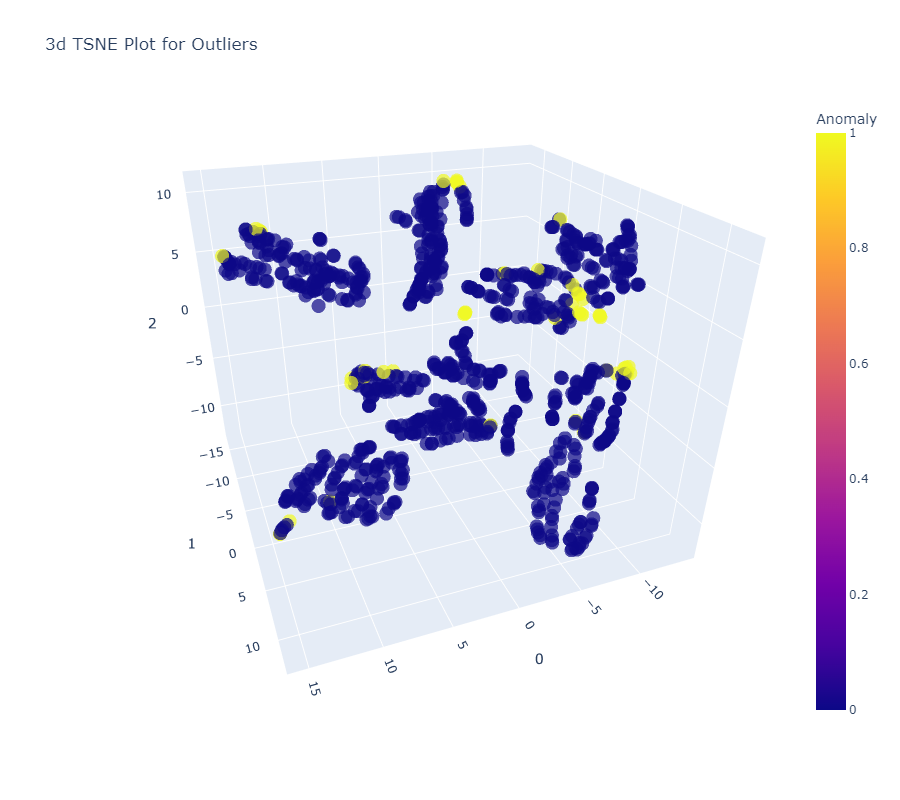
PlotModelAnomaly: This component analyzes the performance of a trained model on the dataset. The type of the plot desired can be set in plot_type.
Plot TSNE Graph
- Lastly,
SaveModelAnomaly: This component saves the transformation pipeline and trained model object into the current working directory as a pickle file for later use.